A recent Vine post of mine showing how I decorated a chair has been getting a lot of love (and 150,000 views) so here's a more detailed description of how I did it. Decoupage is essentially one of the easiest craft techniques there is. A wee bit time consuming, but the results are always epic, especially when you go for large-scale projects like furniture. You will need:
A piece or furniture (I used a red chair that I bought in a charity shop for £4)
Wrapping paper of your choice with motifs of (this one is City Pop-Outs London, designed by Matt Ponting from Doodling Around (around 4 sheets) Can of spray mount and newspaper Pot of Modge Podge (available from craft shops) or clear varnish Brush, scissors, plastic gloves Get going!
Cut out the motifs, in this case London buildings and landmarks. For the best result don't leave space around them, cut out each piece, up to the edges of each line. This is this time consuming part, I did the cutting out while watching several movies.
Once done, marvel at the pretty pieces.
Lay out the newspaper and place the cut out pieces facing downwards. Spray the back with spray mount (glue in a can) then smooth each on to the piece of furniture.
The trick to decoupage is not being too perfectionist, don't make too many plans, just stick each piece down at different angles, as haphazardly as you like.
Be prepared for lots of overlapping, your fave motifs may get covered up but fear not, you can always stick another one on top. It's important to ensure every end is glued down.
Once you're happy with the design (you can go for full coverage but I left some gaps of red, as I liked the colour of the chair) either paint over the whole chair with clear varnish or a couple of layers of Modge Podge, depending on what you can get hold of. And Viola!
The finished chair was displayed on Doodling Around's stand at PULSE a gift trade fair last month. It also got lots of attention, but alas it wasn't for sale.
It's the ultimate London chair!
I did however help out on the stand, giving away some free sheets and encouraged people to have a go at DIYing it themselves.
I love decoupaged furniture. It's a way to quickly transform things, either with just a few pieces, for some detail, or try going to town with full coverage. You can buy special 'decoupage paper' but from experience any paper goes - wrapping paper, comic books, magazines all work perfectly, just avoid anything too thick.
Happy cutting & sticking!
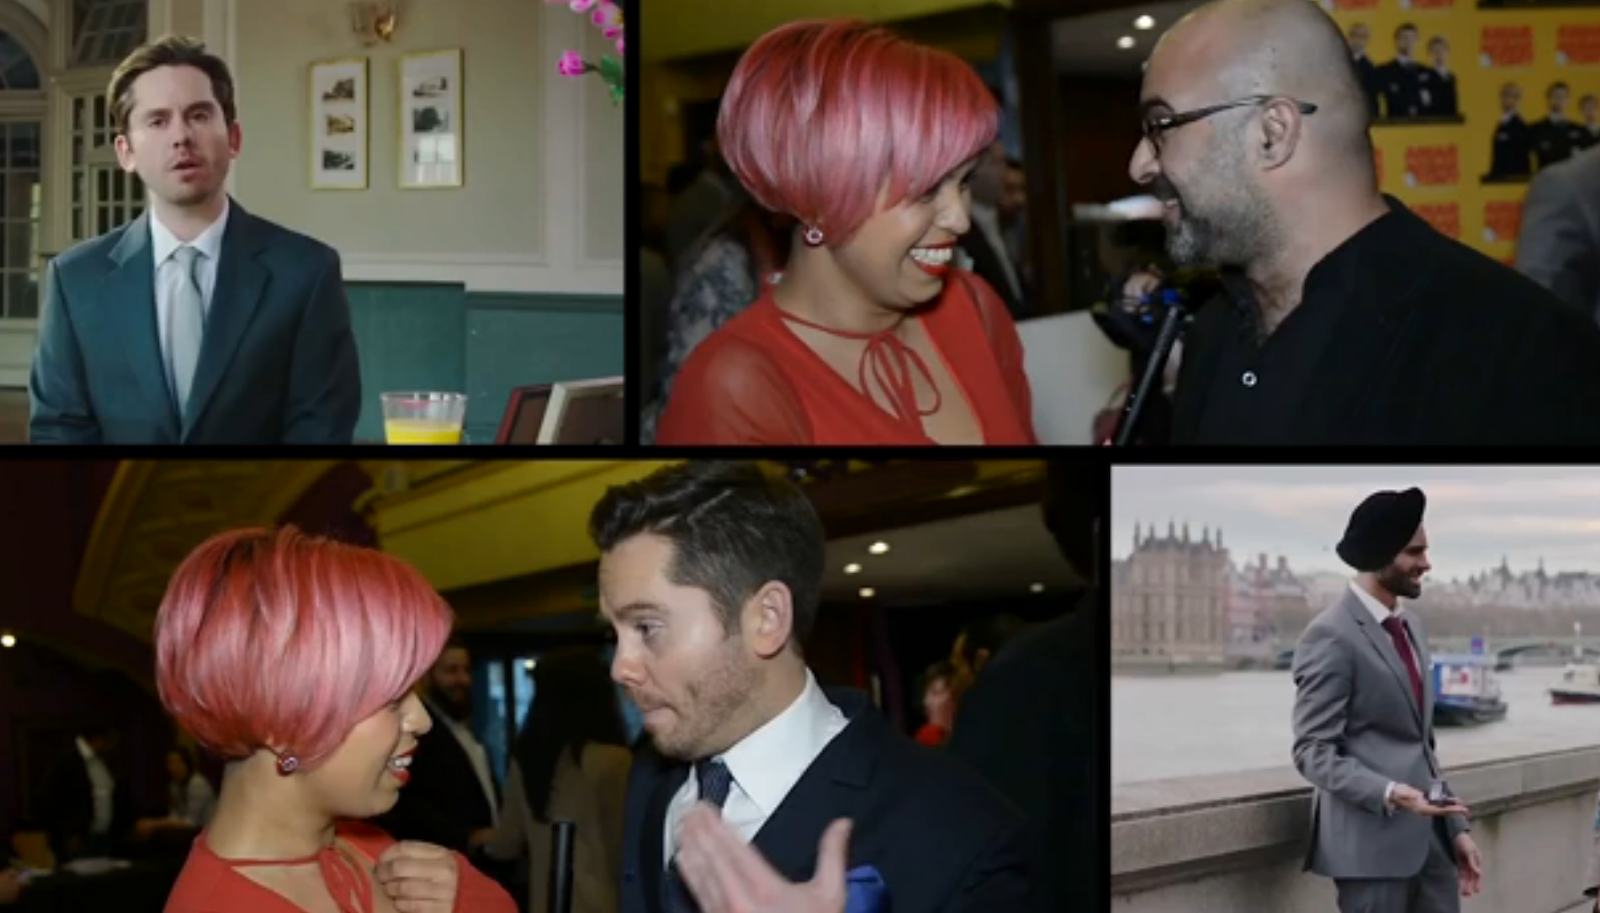
One of the first TV Presenting tasks I ever got asked to do was report from a Red Carpet. It's the staple experience for any wannabe telly presenter - standing outside getting cold for hours, shouting at celebs to get their attention and invariably being ignored...everyone has to try it! I'm not exactly a pro, but as I've done my fair share (including two in the last two weeks), I thought I'd share some advice for anyone starting out, using a recent red carpet example where I covered the Premiere of new British indie movie Amar Akbar & Tony.
The Premiere took place a week before the film released at cinemas (April 17th it's OUT NOW!) at the Cineworld in Haymarket. Thankfully the red carpet bit took place inside, but my camera man Shevy Sandhu and I filmed some links outside to set the scene.
1. GRAB CELEB EVEN IF THEY DON'T WANT TO SPEAK TO YOU
Yes that is Cindy Beale from Eastenders and no she did not want to speak to me but you have to be confident and assertive enough to talk them around; and it does work, even if you only get a sound bite, that's better than nothing!
2. ASK CELEB TO DO SOMETHING
Celebs will be asked similar questions from all the press in attendance so if you can pop in a practical task they'll appreciate it. In the case of the cast of Desi Rascals I asked them to perform their famous Power Dance, which they did!
3. COMMENT ON CELEB'S CLOTHING
This is one of the easiest ways to strike up a conversation (not just on a red carpet but in real life!) and you never know what you may find out. For example after telling Doctors actress Rebecca that I loved her dress, she revealed it's actual vintage and used to belong to her granny. Now you don't find out stuff like that everyday!
4. NAB TWO CELEBS AT THE SAME TIME
I'm not a fan of the saying 'kill two birds with one stone' but getting more than one celeb at once means you get two interviews out of the way and it adds some variety to the overall film.
5. PRETEND YOU KNOW WHO THEY ARE
Again in this instance be confident and enthusiastic. I thought this was Ella from The X Factor but it was Ella from The Apprentice, I didn't watch either so I didn't ask her about the shows - instead I greeted her very enthusiastically so she felt comfortable to talk, and getting someone to talk is the main thing!
6. BE SURE TO INTERVIEW THE LEADING LADY
It's all well and good interviewing the guests but if it's a film you're covering you must nab the leading cast otherwise your report is a bit pointless.
7. REMEMBER THE DIRECTOR & CREW
Remember, these events shouldn't just be about the faces, show some love to the hardworking peeps behind the scenes...after all, there would be no film without the Director who in this case was also the Writer, Producer & Distributor. These people have stories to share that will make your report far more interesting.
8. HAVE FUN
Working on a red carpet isn't really work. There's no need to stress. Rather then trying to get 'the numbers', concentrate on engaging who you speak to and enjoying the whole experience.
9. PLAN A BASIC SCRIPT
I know TV Presenters who never do any planning (and it shows!) and others who get everything written for them, they just turn up and read...but my feeling is you should do some prep. Have an idea of what you want the finished piece to be like and decide on what links you think will work - when it finally happens it can be very quick and before you know it it's over and you may be so caught up in the buzz you forget to record the important stuff, so never be afraid to write scripts and bring them with you, you'll get a much more professional end product.
10. WATCH MY VIDEO TO GET INSPIRED!
After all the advice I've given you need to see me in action right?! Ok well here goes...press the play arrow!
Most of all, every presenter needs to develop their own style so whatever yours is: hone it and go out there and share it with the world!
Catch Amar Akbar & Tony in UK cinemas it's OUT NOW!
I picked up this incredible night dress in Kolkata last year. It was clearly too big for me, but I couldn't ignore the gorgeous green script print fabric and bold colour combinations so I decided to buy it with plans to alter it into something more wearable.
When it comes to be being ruthless I'm very brave so I started by cutting it in half to create a top and bottom section.
Originally I was thinking of changing the shape of the collar but when I tried it on it didn't need anything so I just brought it in at the sides to make it fit better by trimming off the edges with an overlocker before hemming the ends.
The skirt was more complicated. I held it against me to choose the kind of length I liked and then decided to create a waistband which was cut separately. The waistband was going to be made from the excess green fabric but in the end I settled on a wide band of red cotton which was folded over and padded with interfacing. I also used a gathering foot to pull in the fabric to create a more wearable shape.
The most exciting part of this project was that it was the first time I used a button hole foot to affix buttons and make button holes.
And here are the two finished garments just in time to wear for the summer! I love the flare the skirt has and the ''50s diner theme' of the top. To be honest I feel like this blog post makes it look really simple but it did require patience, especially for the skirt which has a zip and buttons and there was quite a bit on unpicking but I got there in the end. It's definately given me the confidence to have a go at altering more garments - especially charity shop finds that don't fit!
Soapmaking is a cheap, quick, satisfying craft that is a great gift idea - not just for Valentines, but also for thank you gestures and house-warming presents. The best thing is that complete novices, any one new to making or lacking in confidence with crafting will get results they'll be proud of within minutes and you don't need much to get started.
You will need:
*Melt & pour soap base OR any glycerin soap as it melts in the same way
(The soap base in available in craft stores or search online)
*Silicone mould (ones for baking are fine)
*Microwave, microwavable bowl & fork
(Alternatively, melt the soap in a pan on your cooker)
*Knife
*Optional - food colouring
*Things to suspend (like dried flowers, glitter, ornaments etc)
*Scent *Clingfilm
1. Chop up the base into small pieces and measure out how much you will need in each compartment of the mould. You will need to add double the quantity of how far it fills up, because it will reduce in size when melted.
2. Heat the base in the microwave for 15 seconds, then stir. Keep melting for 15 second intervals until it's completely liquidised.
3. The base solidifies very quickly. So get ready to put it into the mould as soon as possible. If you are using food colouring add it now. It will lower the temperature of the base making it solidify. If that happens, place it back in the microwave. If you're using glitter, stir it in as well. Now is also the time to add a few drops of scent like a diluted essential oil (they are often too strong on their own.) You can leave the soaps fragrance free but I think they are more fun to use (and more impressive if you are giving them as a gift), if they are scented.
4. Setting takes up to a couple of hours so leave them in a cool place. Then pop them out like ice cubes.
My designs:
1. Hundreds & thousands - I placed plastic initial beads at the bottom of the mould then sprinkled cake decorations on top.
2. Plain blue soap - I coloured this soap by blending blue food colouring into the melted soap base.
3. Plastic beads - I suspended plastic beads in the mould - as it gets used, the beads fall out and you'll end up with enough to make a bracelet!
4. Sequins - I suspended silver star confetti in the base.
5. Red glitter - I mixed glitter and red food colouring into the melted base.
6. Rose buds - First I poured melted clear base into the mould then placed small rose buds directly on the top surface.
Because the soap base is transparent you can see everything that's suspended in it. The top surface of the rose soap shows off the petals, but when you turn it over, you see the lovely buds underneath.
For more soap making ideas this book will fill you with inspiration. Brimming with colourful photos I've used it in spa crafting workshops before and everyone is amazed by it - the instructions are clear and accessible.
Have fun making your own soaps but be warned: buying a shop bought soap is not the same once you're discovered how easy it is to make your own 'bespoke' ones in a matter of minutes at home! NB: Tightly wrap cling film around each of your soaps to preserve them.
One of the first
things I noticed about Bali was the beautiful handmade offerings. These are
small baskets made from natural materials and filled with colourful flowers. Giving them is a ritual followed by Hindus who make them for the gods. They are
normally offered three times a day, though some people I heard about (my taxi
driver’s wife) make 40 a day and even 100 during festivals. It is hoped they
bring prosperity to your home, family, business and health.
Inside temples they are often seen beside
incense.
Whenever you are out walking you’ll find them
placed on the street.
They even accompany drivers to ensure safe
journeys.
Women can be seen making them all over town.
While in the UK you notice stall holders reading a book or knitting while
waiting for customers, in Bali, they occupy themselves making offerings.
I discovered two ways to make them. The cheats,
quick, modern method is to staple together strips of coconut palm into a basket
shape while the traditional and extremely delicate way is to join the strips
using a fine bamboo skewer; as demonstrated in this short video I filmed
outside an art gallery on the Monkey Forest Road in Ubud. Below I’ve described
in more detail how these beautiful baskets are constructed.
You need two raw
materials – firstly coconut palm leaves.
Secondly – fine bamboo skewers.
The first stage
is to trim the palm into equal lengths and remove any rough edges.
There is a vein running down the palm.
For stronger basket the piece of palm can be
folded in half so it’s thicker – this is suitable if you’re intending to place
a large object like a coconut inside.
To join pieces
together you use the bamboo skewer to thread them together, you then break them
off, leaving behind a small stitch. When I tried this myself I didn’t get far
at all. The bamboo is so fine it snaps instantly so trying to push it through
the thick palm takes incredible skill and experience.
This is the typical small basket made from
shorter pieces of palm with strips bent and ‘stitched’ together.
Or you can make a taller one:
These ones were
being made for a local temple to mark a full moon, due to take place in three
days time.
As for what goes
inside, fresh flowers, rice and incense are common, all of which can be
purchased from markets.
If you don’t want to make your own offering they are in abundant supply
on street corners to purchase. Or if you just don’t have the time to make such
complicated versions, you can simplify them, by simply placing your offerings
on a small leaf.
It’s quite
difficult to get hold of the raw materials to make these offering in the UK in
exactly the same way but I plan on making some of my own versions with
substitute materials. They don’t have to be religious, they could be offered to
friends as gifts by assembling cardboard baskets made with strips stapled
together and filled with flowers – also a perfect activity for a craft
workshop.